How to Take a Screenshot on a Chromebook – Shortcuts and Fixes
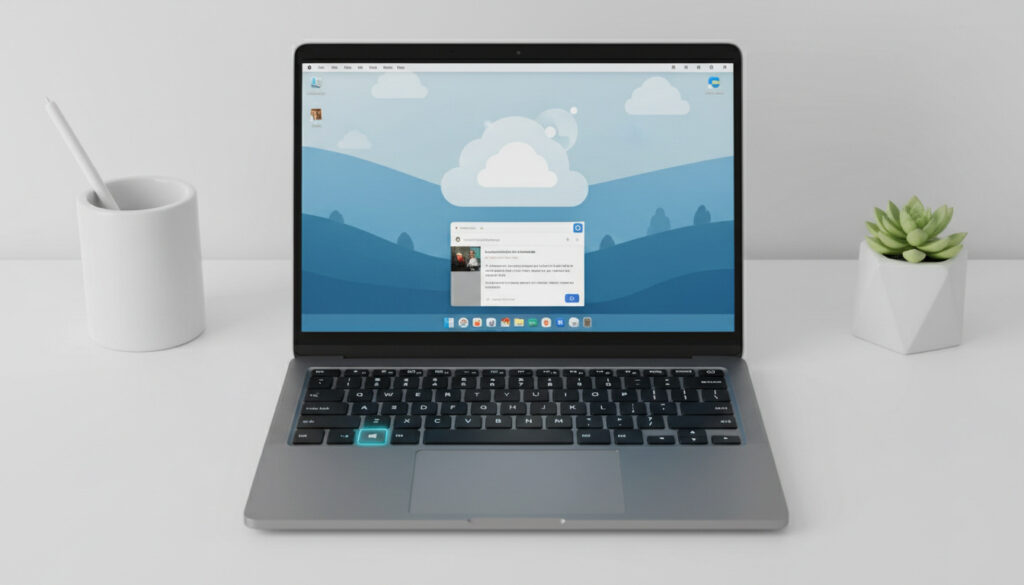
Capturing your screen on a Chromebook relies on the Show Windows key, a rectangle-shaped button replacing the traditional F5 key on most models. Unlike Windows machines with a dedicated Print Screen button, Chrome OS combines this key with modifiers to generate full-screen, partial, or window-specific captures. Mastering these combinations eliminates the need for third-party tools in most scenarios.
Every screenshot automatically saves as a PNG file to the Downloads folder unless routed through specific clipboard shortcuts. The system works uniformly across Chrome OS 80 and later releases, though hardware variations like detachable tablets require alternative gestures. Understanding the distinction between keyboard-driven and touch-based methods ensures consistent results across devices.
How to Take a Full Screenshot on Chromebook
| Method | Shortcut | Output |
|---|---|---|
| Full Screen | Ctrl + Show Windows | Entire desktop saved as PNG |
| Partial Area | Ctrl + Shift + Show Windows | Selected region saved as PNG |
| Single Window | Ctrl + Alt + Show Windows | Active window only saved as PNG |
| Clipboard Copy | Ctrl + Shift + Switcher | Full screen copied to clipboard |
- All screenshots default to the Downloads folder unless using clipboard-specific shortcuts.
- File naming follows the format “Screenshot [date] at [time].png” automatically.
- The Show Windows key displays a rectangle or box icon on standard Chromebook keyboards.
- Chrome OS 80 or later is required for full shortcut functionality across all models.
- Partial captures trigger an immediate editing toolbar before finalizing the save.
- Tablet devices utilize physical button combinations rather than keyboard modifiers.
- Google Support documentation confirms these shortcuts work on all supported hardware.
| Action | Keyboard Shortcut | Touch/Tablet Alternative | Output Destination |
|---|---|---|---|
| Full Desktop Capture | Ctrl + Show Windows | Power + Volume Down | Downloads Folder |
| Partial Region Capture | Ctrl + Shift + Show Windows | Quick Settings Tool | Downloads Folder |
| Specific Window Capture | Ctrl + Alt + Show Windows | N/A | Downloads Folder |
| Direct to Clipboard | Ctrl + Shift + Switcher | Share Menu | System Clipboard |
| Edit After Capture | Toolbar appears post-selection | Gallery App | Edited PNG |
| Change Save Location | Settings > Storage > Downloads | Files App Settings | User-defined folder |
How to Capture Partial Screenshots and Specific Windows
Selecting a Custom Region
Activate partial capture mode by holding Ctrl + Shift + Show Windows. The cursor transforms into a crosshair. Drag to define the boundaries of your desired area, then press Enter to confirm the selection. Video demonstrations show that releasing the mouse button without pressing Enter allows adjustment of the selection box.
After defining a partial capture area, a toolbar appears offering crop, annotation with draw or text tools, and undo options before the file saves to Downloads.
Isolating a Single Window
To capture only the active application, press Ctrl + Alt + Show Windows. The cursor changes to a camera icon; click the target window to exclude background elements and secondary monitors from the final image. This method proves essential for documenting specific app interfaces without revealing desktop clutter.
Clipboard Integration
Standard shortcuts save files to storage. Directing captures to the clipboard instead requires pressing Ctrl + Shift + Switcher for full-screen copies. For partial captures to clipboard, third-party extensions like Lightshot or Nimbus become necessary, as native partial saves always generate files.
Where Screenshots Are Saved on Chromebook
The Downloads Folder Default
Every screenshot lands immediately in the Downloads folder, accessible via the Files app or Launcher search. The system organizes files chronologically with timestamps embedded in filenames. Alternative access methods include voice commands or pinning the Screenshot tool to the shelf for non-keyboard setups.
Customizing Storage Location
Redirect future captures by navigating to Settings > Storage > Downloads and selecting a new default folder. This setting affects only new screenshots; existing files remain in their original location. The Quick Settings menu, accessed via the notification tray, provides capture options without altering these storage preferences.
Screenshot on Chromebook Tablets and Troubleshooting
Tablet Mode Gestures
Detachable Chromebooks and tablets rely on physical buttons. Press Power + Volume Down simultaneously for full-screen captures. For partial screenshots, swipe down from the top-right corner to access Quick Settings, then select the Screenshot icon. Some models support a three-finger swipe up from the bottom as an alternative full-capture gesture. Demonstrations on tablet workflows confirm these methods bypass keyboard requirements entirely.
When Shortcuts Fail
If Ctrl + Show Windows stops responding, verify that screen capture shortcuts remain enabled in Settings > Advanced > Accessibility. Toggle “Enable screen capture keyboard shortcuts” to the on position, as system updates occasionally reset this preference. Google Support threads indicate that conflicts often arise on managed devices or specific hardware like the Acer CB315 series.
Many reported failures of the Ctrl + Show Windows shortcut stem from this accessibility toggle being disabled during Chrome OS updates, particularly on enterprise-managed Chromebooks.
Keyboards lacking the Show Windows key require remapping. Disable “Treat top-row keys as function keys” in Settings > Device > Keyboard. If hardware limitations persist, install extensions like Awesome Screenshot or Fireshot from the Chrome Web Store. Community forums note that no widespread 2024-specific issues exist beyond these configuration conflicts.
When all shortcuts fail, open Chrome DevTools with Ctrl + Shift + I, press Ctrl + Shift + P, type “screenshot,” and select full or partial capture options after enabling the Device Toolbar.
Timeline of Chrome OS Screenshot Evolution
- : Introduction of the Show Windows (Switcher) key as the primary modifier, standardizing capture shortcuts across all Chromebook models.
- : Partial screenshot capability added, allowing rectangular region selection rather than full-screen-only capture options.
- : Native screen recording integrated into the Quick Settings panel, utilizing the same infrastructure as static captures.
- : Stabilization of current shortcut standards across all Chrome OS 80+ devices with added accessibility toggle options for hardware variations.
- : No major shortcut changes; Chrome OS release notes focus on troubleshooting accessibility conflicts and tablet gesture optimization.
Established Facts vs. Common Uncertainties
| Consistent Across All Devices | Varies by Model or Setup |
|---|---|
| Ctrl + Show Windows captures full screen on Chrome OS 80+ | Presence of Show Windows key on external keyboards |
| All screenshots save as PNG files by default | Specific gesture support on tablet models |
| Downloads folder is the default save location | Enterprise policies restricting screenshot capability |
| Partial capture requires Enter to confirm selection | Behavior of top-row function keys before remapping |
Why Chromebook Screenshots Differ from Other Systems
Windows machines rely on the Print Screen key and Win + Shift + S for partial captures, while Mac systems use Command + Shift combinations. Chromebooks diverge by centering functionality on the Show Windows key, reflecting the operating system’s window-management architecture. This design prioritizes file-based storage over clipboard dumping, requiring users to adapt to retrieval via the Files app rather than immediate paste operations.
The ecosystem compensates for native limitations through extensions. While competing operating systems offer built-in scrolling captures or direct clipboard integration, Chromebook users seeking these features must install third-party tools from the Chrome Web Store, creating a modular approach to screen capture functionality.
Official Sources and Technical Documentation
Screen capture keyboard shortcuts allow you to take a screenshot or record your screen.
Google Chromebook Support
Issues often tie to accessibility settings or hardware like Acer CB315 models.
Acer Community Forums
Summary
Mastering Chromebook screenshots requires familiarity with Show Windows key combinations: Ctrl for full screen, Ctrl + Shift for partial regions, and Ctrl + Alt for specific windows. Files automatically populate the Downloads folder, while tablet users employ Power and Volume Down buttons. When shortcuts malfunction, accessibility settings usually resolve the conflict. For additional technical guidance, these methods provide reliable capture across all Chrome OS devices.
Frequently Asked Questions
What is the difference between Chromebook and Windows screenshot methods?
Windows uses a dedicated Print Screen key and Win + Shift + S for partial capture, while Chromebooks rely on the Show Windows key with Ctrl modifiers. Windows saves to clipboard by default; Chromebooks save to the Downloads folder.
Can I take scrolling screenshots on Chromebook?
No native single-key shortcut exists for full-page scrolling captures. Use Chrome DevTools (Ctrl + Shift + P > “Capture full size screenshot”) or install extensions like Fireshot or Awesome Screenshot.
How do I screenshot on Chromebook without a keyboard?
Use the Quick Settings menu by clicking the time in the bottom-right corner, then select the Screenshot icon. On tablets, press Power + Volume Down simultaneously.
Why is my Chromebook screenshot shortcut not working?
Verify that Settings > Advanced > Accessibility > “Enable screen capture keyboard shortcuts” is toggled on. Restart the device or check for Chrome OS updates if issues persist.
How do I copy a screenshot directly to clipboard?
Press Ctrl + Shift + Switcher for full screen to clipboard, or use extensions like Lightshot. Standard shortcuts save files; copy them afterward by right-clicking the image in Files and selecting Copy.
Do Chromebook screenshots include the cursor?
Standard capture methods exclude the cursor from the final image. The pointer disappears during the screenshot process and reappears after capture completion.
Can I change where screenshots are saved?
Yes. Navigate to Settings > Storage > Downloads to select a new default folder. This setting affects future screenshots but will not relocate existing files.
More related posts
 Internet Speed Test Google – How to Run, Accuracy and Results Guide
 63 Inches in Feet: Exact Conversion and Height Context
 How Many Teaspoons in a Tablespoon? (Conversion Guide)
 Drive u 7 Home Guide: Unblocked Browser Games Free
 Easy Portuguese Recipes at Home: Quick Dinners & Desserts
 Can Dogs See in the Dark? Night Vision Facts
 Jack of All Trades Master of None: Full Quote & Origin
 Cast of We Were Liars TV Series – Actors & Characters